Navigation Tags
Navigation Tags are tags with a route attached. When a visitor activates one, the tour draws a trail of virtual bubbles from where they're standing to the tag's location and walks them there.
Plan availability. Navigation Tags are included on the Business and Enterprise plans.
Use Navigation Tags when:
- You want a single destination to be reachable from anywhere in the tour with one click.
- You're building a guided experience and want to "send" the visitor to the next point of interest without making them browse a menu.
- You want to expose navigation paths from places other than the menu — a Burger Menu link, a clickable image in Media, an external deep link.
For the full Navigation Menu setup (categories, sweeps, barriers, teleports, kiosks), see Navigation Tool.
Create a Navigation Tag
Open the tour, then go to Workspace → Tags and click the + button.
Give the tag a name. Open its Navigation settings and turn on AR, WEB, or both depending on where you want the path to appear.

For each navigation tag you can decide:
- Whether the tag's content opens on arrival
- Whether a "teleport to here" button is shown
- Whether the visitor is auto-moved at the end of the path
- Whether attached media autoplays on arrival


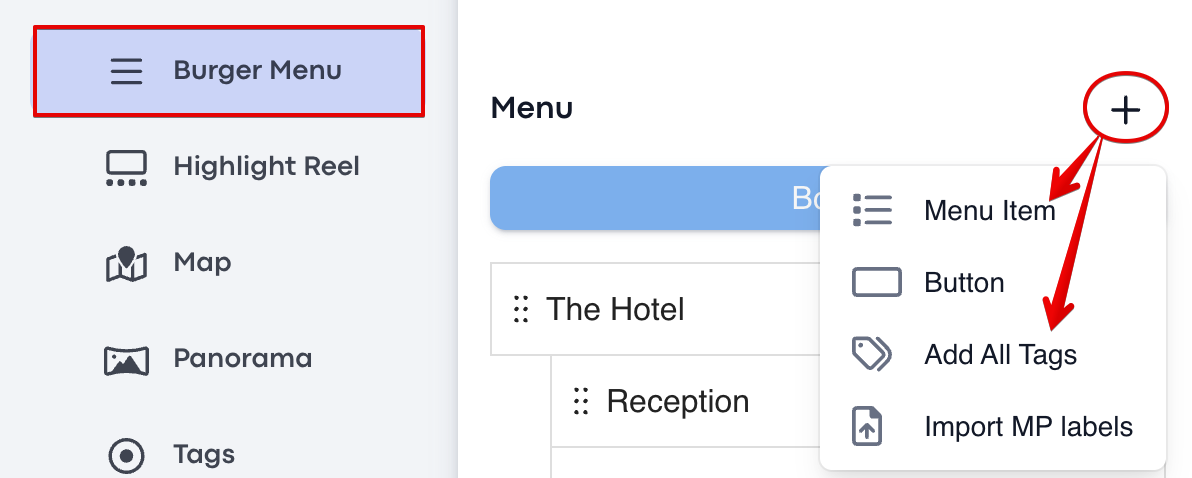
To let visitors trigger the route from the side menu, add the tag as a Burger Menu item. You can add tags individually, or use Add All Tags to bulk-import every navigation-enabled tag at once.



Use deep links to trigger a navigation path
You don't have to attach a path to a tag — any element that can hold a deep link can trigger the same navigation behavior. Two common patterns:
1. From the Burger Menu
Add a custom Burger Menu item whose action is Navigation Path, then paste a deep link to the destination.
To grab a deep link for a specific destination, navigate to that destination in the tour and press Ctrl + Y — the current location URL is copied to your clipboard.
In the editor, open the Burger Menu panel and click + → Menu Item.

Give the menu item a title, then set its action to Navigation Path.

Paste the destination's deep link into the link field and save.

2. From a Media image
Same idea, but the trigger is a clickable image placed in the tour via Media — useful for visual cues like "click this floor plan to navigate".
Open Media in the editor, click + Add, and upload or insert the image you want to use as a trigger.

Position the image in the tour, then in its settings set the click action to Navigation Path and paste the destination's deep link.

Heads up. Deep links require the AR and Flows add-ons on the tour. They don't work in Experience or V-Commerce tour types. (Also covered in the FAQ.)
Tips
- One-click jump from a key tag. If you have one "must-see" destination, exposing it as a top-level Burger Menu item gets visitors there faster than a menu drill-down.
- Mattertags work too. If your tour has Matterport-imported tags, you can enable navigation on them from the tag's settings without recreating them as Treedis tags. (See the FAQ.)
- Test on mobile. Navigation Tags behave slightly differently on mobile (drawer-style menu). Always do a quick check on a phone before publishing.
Related articles
Navigation Tool Full walkthrough of the Navigation Tool, end to end. Navigation Tool — FAQ Quick answers to common Navigation Tool questions.Need help?
If a tag's path isn't drawing or a deep link won't save, the most common cause is the tour's add-on configuration. Check the FAQ entry on deep links first. Still stuck? Contact support@treedis.com.